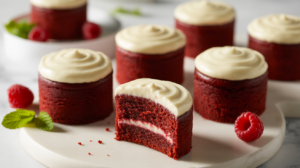
Hello, bakers! Charlotte here from Tasty Unbound. Picture this: a perfectly portioned, personal-sized cake with a dramatic, vibrant red hue. You press your fork into it, revealing a crumb so tender and moist it’s almost unbelievable. Then you get a taste of that luscious, tangy-sweet cream cheese frosting, and you know you’ve just found your new favorite dessert. Welcome to the world of Mini Red Velvet Cakes!
This isn’t just another recipe; it’s the most comprehensive guide you’ll find online. I’ve tested this recipe relentlessly to ensure it’s foolproof, and with this guide, you’ll master making perfect mini red velvet cakes every time. Get ready to create the most stunning individual red velvet cakes you’ve ever made.

Table of Contents
Why This Recipe Works
This small red velvet cake recipe is a keeper, and here’s why it stands out from the rest. This is my ultimate guide to flawless mini red velvet cakes.
- Perfectly Moist & Tender: Forget dry, crumbly red velvet. We use a combination of buttermilk and oil to create a velvety, ultra-moist crumb. It’s our secret for a perfect texture in your mini red velvet cakes every single time.
- Foolproof & Tested: I’ve baked these cakes using three different popular methods (a mini cake pan, a standard muffin tin, and a sheet pan) to guarantee you get perfect results no matter what equipment you have.
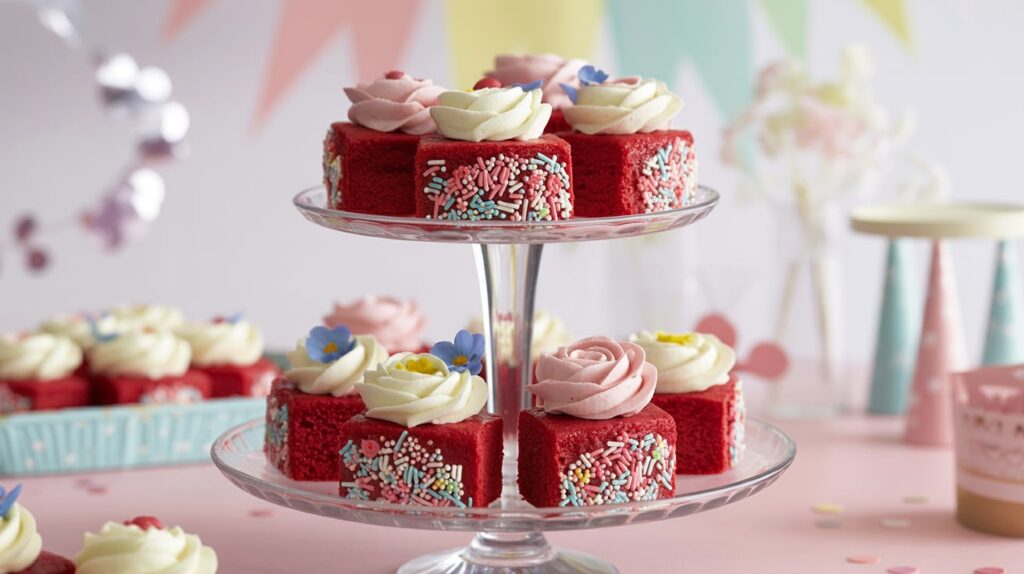
- Stunning Showstopper: With their deep red color and pristine white frosting, these little cakes are pure elegance. They look incredibly impressive but are surprisingly simple to make—perfect for Valentine’s Day, birthdays, or holiday parties.
- Perfectly Portioned: No slicing, no mess. These individual red velvet cakes are ideal for serving at parties, giving as gifts, or simply enjoying a decadent treat without committing to a whole cake.
Ingredient Spotlight: The Science of Red Velvet
The magic of a true red velvet cake is all about food science! Understanding these ingredients is key to achieving the classic taste and texture of authentic mini red velvet cakes.
- Buttermilk & Vinegar: This acidic duo is the heart of the recipe. The acid in both buttermilk and white vinegar reacts with the baking soda, creating carbon dioxide bubbles that give the cake its signature soft, tender, and light crumb.
- The Right Cocoa Powder: For this recipe, you must use natural unsweetened cocoa powder, not Dutch-processed. Dutch-processed cocoa has been neutralized, so it won’t react with the acids. Natural cocoa contributes to the cake’s tender texture and classic flavor profile.
- Oil vs. Butter: While many cakes use butter for flavor, we use a neutral oil here. Why? Oil is 100% fat, while butter contains water. This means oil produces a more consistently moist and tender cake, which is exactly what we want for our mini red velvet cakes.
Equipment Needed
Here’s the essential equipment you’ll need to make these mini red velvet cakes:
- Mixing Bowls (one large, one medium)
- Whisk and a rubber spatula
- Electric Mixer (stand or hand-held, for the frosting)
- Your choice of baking pan:
- Option 1: A Mini Cake Pan (for classic tiered shapes)
- Option 2: A Standard 12-cup Muffin Tin
- Option 3: A 9×13-inch Sheet Pan and a round cookie cutter
How to Make Perfect Mini Red Velvet Cakes: Step-by-Step
Let’s get baking! Follow these simple steps for flawless results.
1. Prep Your Pans and Preheat the Oven.
Preheat your oven to 350°F (175°C). Thoroughly grease and flour your chosen pan. This is a crucial step to ensure your cakes release cleanly.
2. Combine Dry Ingredients.
In a large bowl, whisk together the all-purpose flour, granulated sugar, natural cocoa powder, baking soda, and salt.
3. Combine Wet Ingredients.
In a separate medium bowl, whisk together the buttermilk, oil, large eggs, white vinegar, and vanilla extract until smooth.
4. Mix Wet and Dry.
Pour the wet ingredients into the dry ingredients. Mix just until the last streaks of flour disappear. Be careful not to overmix!
5. Add the Red Food Coloring.
Gently fold in the red gel food coloring until the color is uniform and vibrant. Gel coloring provides an intense red without adding excess liquid.
6. Fill the Pans & Bake.
Carefully portion the batter into your prepared pan(s). See the “3 Ways to Make Mini Cakes” section below for specific filling and baking time instructions.
7. Cool Completely.
Let the cakes cool in the pan for 10 minutes before inverting them onto a wire rack to cool completely. Frosting warm mini red velvet cakes will result in a melted, runny mess.
The Best Cream Cheese Frosting
This frosting is the perfect balance of tangy and sweet. The secret? Use cold, block-style cream cheese for a thick, pipeable consistency.
Ingredients:
- 8 oz (226g) full-fat block cream cheese, cold
- 1/2 cup (113g) unsalted butter, softened
- 4 cups (480g) powdered sugar, sifted
- 1 ½ tsp vanilla extract
- Pinch of salt
Instructions:
- In a large bowl, beat the cold cream cheese and softened butter on medium-high speed until smooth and creamy, about 2 minutes.
- Turn the mixer to low and gradually add the sifted powdered sugar.
- Add the vanilla and salt. Increase the speed to medium-high and beat for 2-3 minutes until the frosting is light and fluffy.
Baker’s Tips & Troubleshooting
Ran into an issue? Don’t worry! Here are answers to common questions.
- Q: Why did my cakes turn out brown, not red?
- A: This usually happens if you used Dutch-processed cocoa or not enough food coloring. Use natural cocoa and a concentrated gel food coloring for the most vibrant red.
- Q: Why are my cakes dry?
- A: The usual culprits for dry mini red velvet cakes are overbaking or overmixing the batter. Bake just until a toothpick comes out with a few moist crumbs.
- Q: My cream cheese frosting is runny. How do I fix it?
- A: This almost always happens when the cream cheese is too soft. Start with cold cream cheese. If it’s already runny, try chilling it in the refrigerator for 30 minutes.
- Q: Can I use a different type of food coloring?
- A: Yes, but gel food coloring is best. If you only have liquid coloring, you will need to use a lot more, which can slightly alter the texture of your mini red velvet cakes.
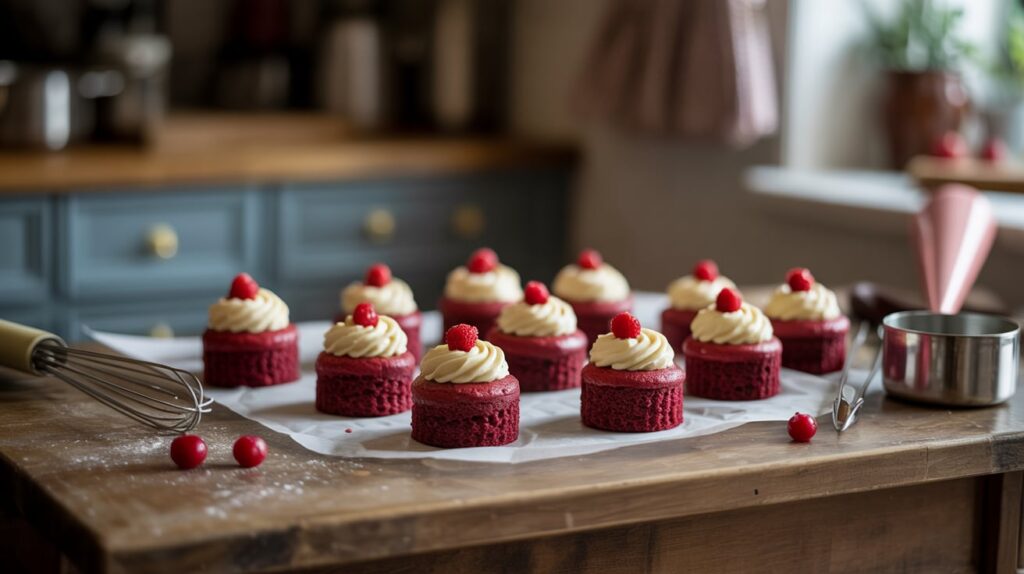
3 Ways to Make Mini Cakes
Choose your own adventure! This batter works perfectly for mini red velvet cakes in all three of these pans.
1. Method 1: The Classic Mini Cake Pan
This pan creates adorable, multi-layered mini cakes. Fill each cavity about two-thirds full.
- Bake Time: 20-25 minutes.
2. Method 2: The Muffin Tin Method
The easiest way to make perfect cupcake-sized individual red velvet cakes. Use liners and fill them two-thirds full.
- Bake Time: 18-22 minutes.
3. Method 3: The Sheet Pan & Cookie Cutter Method
My favorite trick for perfectly uniform cakes! Spread the batter in a 9×13-inch sheet pan. Once baked and cooled, use a round cookie cutter to punch out your cakes.
- Bake Time: 15-20 minutes.
Frequently Asked Questions (FAQs)
- How do I store mini red velvet cakes?
- Because of the cream cheese frosting, they must be stored in an airtight container in the refrigerator for up to 4-5 days.
- Can I make these ahead of time?
- Absolutely! Bake the cakes a day or two in advance and store them, unfrosted, in an airtight container at room temperature. Frost just before serving.
- Can I freeze these mini red velvet cakes?
- Yes! For best results, freeze the unfrosted cakes. Wrap them individually in plastic wrap and place them in a freezer bag for up to 3 months. Thaw at room temperature before frosting.
- How do I make these Gluten-Free?
- Substitute the all-purpose flour with a high-quality 1-to-1 gluten-free baking flour blend that contains xanthan gum.
- Can I make these vegan/dairy-free?
- Yes! Use plant-based buttermilk (1 cup non-dairy milk + 1 tbsp lemon juice), flax eggs, and your favorite dairy-free butter and cream cheese.
The most moist, tender, and foolproof mini red velvet cakes with a tangy cream cheese frosting. This guide from Tasty Unbound includes three different baking methods!
Prep Time: 20 minutesCook Time: 20 minutesTotal Time: 40 minutesServings: 12-16 mini cakesCalories: Approx. 380 kcal per cake
Ingredients
For the Cakes:
- 2 ½ cups (300g) all-purpose flour
- 1 ½ cups (300g) granulated sugar
- 1 tbsp (7g) natural unsweetened cocoa powder
- 1 tsp baking soda
- 1 tsp salt
- 1 ½ cups (360ml) vegetable or canola oil
- 1 cup (240ml) buttermilk, room temperature
- 2 large eggs, room temperature
- 1 tbsp white vinegar
- 1 tsp vanilla extract
- 1-2 tsp red gel food coloring
For the Cream Cheese Frosting:
- 8 oz (226g) full-fat block cream cheese, cold
- ½ cup (113g) unsalted butter, softened
- 4 cups (480g) powdered sugar, sifted
- 1 ½ tsp vanilla extract
- Pinch of salt
Instructions
- Preheat oven to 350°F (175°C). Grease and flour your chosen pan(s).
- In a large bowl, whisk together flour, sugar, cocoa powder, baking soda, and salt.
- In a separate bowl, whisk together oil, buttermilk, eggs, vinegar, and vanilla.
- Pour the wet ingredients into the dry and mix just until combined.
- Fold in the red gel food coloring until the batter is a uniform, vibrant red.
- Portion batter into pans and bake according to the times listed in the “3 Ways” section.
- Let cool completely on a wire rack before frosting.
- To make the frosting, beat the cold cream cheese and softened butter until smooth. Add powdered sugar, vanilla, and salt. Beat until light and fluffy.
- Once cakes are cool, frost and enjoy!
Notes:
- Use natural cocoa powder, not Dutch-processed.
- Do not overmix the batter for a tender crumb.
- Ensure cakes are completely cool before frosting.
- For the best frosting, use cold, full-fat, block-style cream cheese.
Your Turn to Bake!
I truly hope you love these Mini Red Velvet Cakes as much as I do. There’s nothing quite like sharing homemade mini red velvet cakes with people you love.
If you make this recipe from tastyunbound.com, please leave a comment and a star rating below! Your feedback helps me and other readers. I’d love to see your beautiful creations on Instagram—tag us @tastyunbound so we can share them! Happy baking